Wio Terminal 文件系统
本文主要介绍如何在 Wio Terminal 上使用文件系统(File System),你可以使用文件系统库在 SD 卡上进行文件读写等操作。Wio Terminal 提供了一个 microSD 卡插槽,允许使用 SPI 接口读/写 SD 卡。

安装依赖库
首先需要为 Wio Terminal 安装 Seeed_Arduino_FS 文件系统库和 Seeed_Arduino_SFUD 库。
1、在 Seeed_Arduino_FS 的 GitHub 仓库 下载 zip 包。
2、在 Seeed_Arduino_SFUD 的 GitHub 仓库 下载 zip 包。
3、然后打开 Arduino IDE,点击 项目 > 加载库 > 添加 .ZIP 库…,添加这两个库。
microSD 卡的格式
Wio Terminal 支持 microSD 卡的最大容量为 16GB,支持下列文件系统格式:
- FAT12
- FAT16
- FAT32
- exFAT
读写 SD 卡
下面这个示例将演示如何在 Wio Terminal 中读/写 SD 卡。有了这个功能,你就可以从 SD 卡加载数据,例如将传感器的历史数据存储到 SD 卡,再从 SD 卡读取并显示在 LCD 屏幕上。
初始化 SD 卡
首先需要包含 Seeed_FS.h 头文件,然后调用 SD.begin(SDCARD_SS_PIN, SDCARD_SPI) 初始化 SD 卡,Wio Terminal 和 SD 之间的通信使用 SPI 协议。
#include <SPI.h>
#include <Seeed_FS.h>
#include "SD/Seeed_SD.h"

File myFile; //Intialise the file Class and named it myFile

void setup() {
  Serial.begin(115200);
  while (!Serial) {
  }

  Serial.print("Initializing SD card...");
  if (!SD.begin(SDCARD_SS_PIN, SDCARD_SPI)) {
    Serial.println("initialization failed!");
    while (1);
  }
  Serial.println("initialization done.");
}

void loop() {}
写数据到 SD 卡
要写入 SD 卡,需要先打开文件。文件系统有不同的模式,所以需要说明打开文件时使用的模式,模式如下:
| FILE MODE | 定义 |
|---|---|
| 写(WRITE) | FILE_WRITE |
| 读(READ) | FILE_READ |
| 追加(APPEND) | FILE_APPEND |
要打开文件,可以使用 File 类的 open 函数,它有两个参数:
open(const char *filepath, uint8_t mode = FILE_READ) //default mode is READ
这里,打开一个 txt 文件 test.txt,并且使用 FILE_WRITE 模式(只写)。要将数据写入 txt 文件,可以使用 File 类的 println 函数。代码如下:
  // open the file. note that only one file can be open at a time,
  // so you have to close this one before opening another.
  myFile = SD.open("test.txt", FILE_WRITE); //Writing Mode

  // if the file opened okay, write to it:
  if (myFile) {
    Serial.print("Writing to test.txt...");
    myFile.println("testing 1, 2, 3."); //Writing this to the txt file
    // close the file:
    myFile.close();
    Serial.println("done.");
  } else {
    // if the file didn't open, print an error:
    Serial.println("error opening test.txt");
  }
提示:读写完成后记得关闭文件。
从 SD 卡读数据
要从 SD 卡读取数据,同样需要打开文件。这一次,我们使用 FILE_READ 模式(只读)打开。在调用 read() 函数读取数据之前,可以先使用 File 类的 availble() 函数可以检查文件是否可用。
myFile = SD.open("test.txt", FILE_READ); //Read Mode
  if (myFile) {
    Serial.println("test.txt:");

    // read from the file until there's nothing else in it:
    while (myFile.available()) {
      Serial.write(myFile.read());
    }
    // close the file:
    myFile.close();
  } else {
    // if the file didn't open, print an error:
    Serial.println("error opening test.txt");
  }
}
完整代码
#include <SPI.h>
#include <Seeed_FS.h>
#include "SD/Seeed_SD.h"

File myFile;

void setup() {
  Serial.begin(115200);
  while (!Serial) {
  }
  Serial.print("Initializing SD card...");
  if (!SD.begin(SDCARD_SS_PIN, SDCARD_SPI)) {
    Serial.println("initialization failed!");
    while (1);
  }
  Serial.println("initialization done.");

  // open the file. note that only one file can be open at a time,
  // so you have to close this one before opening another.
  myFile = SD.open("test.txt", FILE_WRITE);

  // if the file opened okay, write to it:
  if (myFile) {
    Serial.print("Writing to test.txt...");
    myFile.println("testing 1, 2, 3.");
    // close the file:
    myFile.close();
    Serial.println("done.");
  } else {
    // if the file didn't open, print an error:
    Serial.println("error opening test.txt");
  }

  // re-open the file for reading:
  myFile = SD.open("test.txt", FILE_READ);
  if (myFile) {
    Serial.println("test.txt:");

    // read from the file until there's nothing else in it:
    while (myFile.available()) {
      Serial.write(myFile.read());
    }
    // close the file:
    myFile.close();
  } else {
    // if the file didn't open, print an error:
    Serial.println("error opening test.txt");
  }
}

void loop() {
  // nothing happens after setup
}
通过 QSPI 读写 Flash
随着 FS 库的更新,我们在系统中引入了 SFUD 库,你现在可以使用 QSPI 访问 Wio Terminal 上一块 4MB 大小 Flash 闪存。
下面将演示如何对这块 Flash 进行读写擦(Read/Erase/Write):
#include <sfud.h>

#define SFUD_DEMO_TEST_BUFFER_SIZE                     1024
static uint8_t sfud_demo_test_buf[SFUD_DEMO_TEST_BUFFER_SIZE];
static void sfud_demo(uint32_t addr, size_t size, uint8_t *data);

#define SERIAL Serial

void setup()
{
    SERIAL.begin(115200);
    while(!SERIAL) {};
    while(!(sfud_init() == SFUD_SUCCESS));
    #ifdef SFUD_USING_QSPI
    sfud_qspi_fast_read_enable(sfud_get_device(SFUD_W25Q32_DEVICE_INDEX), 2);
    #endif
    sfud_demo(0, sizeof(sfud_demo_test_buf), sfud_demo_test_buf);
}

void loop()
{

}
/**
 * SFUD demo for the first flash device test.
 *
 * @param addr flash start address
 * @param size test flash size
 * @param size test flash data buffer
 */
static void sfud_demo(uint32_t addr, size_t size, uint8_t *data) {
    sfud_err result = SFUD_SUCCESS;
    const sfud_flash *flash = sfud_get_device_table() + 0;
    size_t i;
    /* prepare write data */
    for (i = 0; i < size; i++) {
        data[i] = i;
    }
    /* erase test */
    result = sfud_erase(flash, addr, size);
    if (result == SFUD_SUCCESS) {
        SERIAL.println("Erase the flash data finish");
    } else {
        SERIAL.println("Erase flash data failed");
        return;
    }
    /* write test */
    result = sfud_write(flash, addr, size, data);
    if (result == SFUD_SUCCESS) {
        SERIAL.println("Write the flash data finish");
    } else {
        SERIAL.println("Write the flash data failed");
        return;
    }
    /* read test */
    size_t BaseTime = micros();
    result = sfud_read(flash, addr, size, data);
    size_t CostTime = micros() - BaseTime;
    if (result == SFUD_SUCCESS) {
        SERIAL.println("Read the flash data success.");
        SERIAL.println("Offset (h) 00 01 02 03 04 05 06 07 08 09 0A 0B 0C 0D 0E 0F\r\n");
        for (i = 0; i < size; i++) {
            if (i % 16 == 0) {
                SERIAL.print("0x");
                SERIAL.print(addr + i,HEX);
                SERIAL.print("\t");
            }
            SERIAL.print(data[i],HEX);
            SERIAL.print("\t");
            if (((i + 1) % 16 == 0) || i == size - 1) {
                SERIAL.println("");
            }
        }
        SERIAL.println(" ");
    } else {
        SERIAL.println("Read the flash data failed.");
    }
    /* data check */
    for (i = 0; i < size; i++) {
        if (data[i] != i % 256) {
            SERIAL.println("Read and check write data has an error.");
            break;
        }
    }
    if (i == size) {
        SERIAL.println("The flash test is success.\r\n");
        SERIAL.print("read costTime: ");
        SERIAL.print(CostTime);
        SERIAL.println(" us");
    }
}
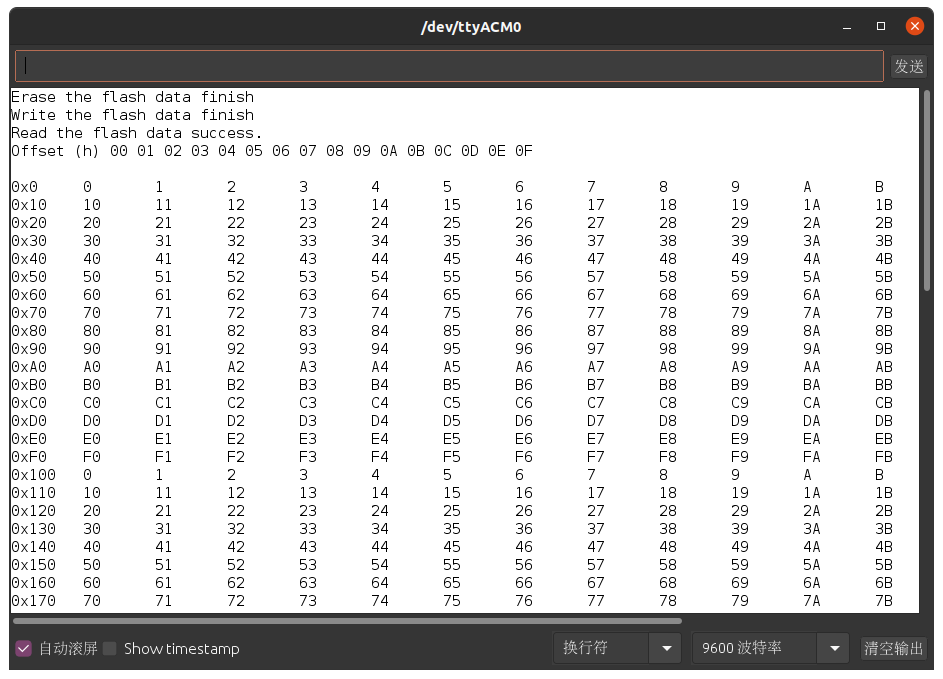
编译并上传程序到 Wio Terminal,打开串口监视器可以看到如下打印: